




How to Optimize BIOS Settings for Gaming
Before a single game loads, your BIOS has already decided how fast your components run and how smoothly they share resources. Learning how to optimize BIOS settings for gaming can give your Ginger6 system a noticeable lift in frame rates, responsiveness and stability, without touching Windows or your favourite titles.
Whether you ordered a custom gaming PC from Ginger6 or you are simply curious about the options inside your motherboard’s menus, the aim here is to help you tune safely, step by step, using settings that actually matter for games.
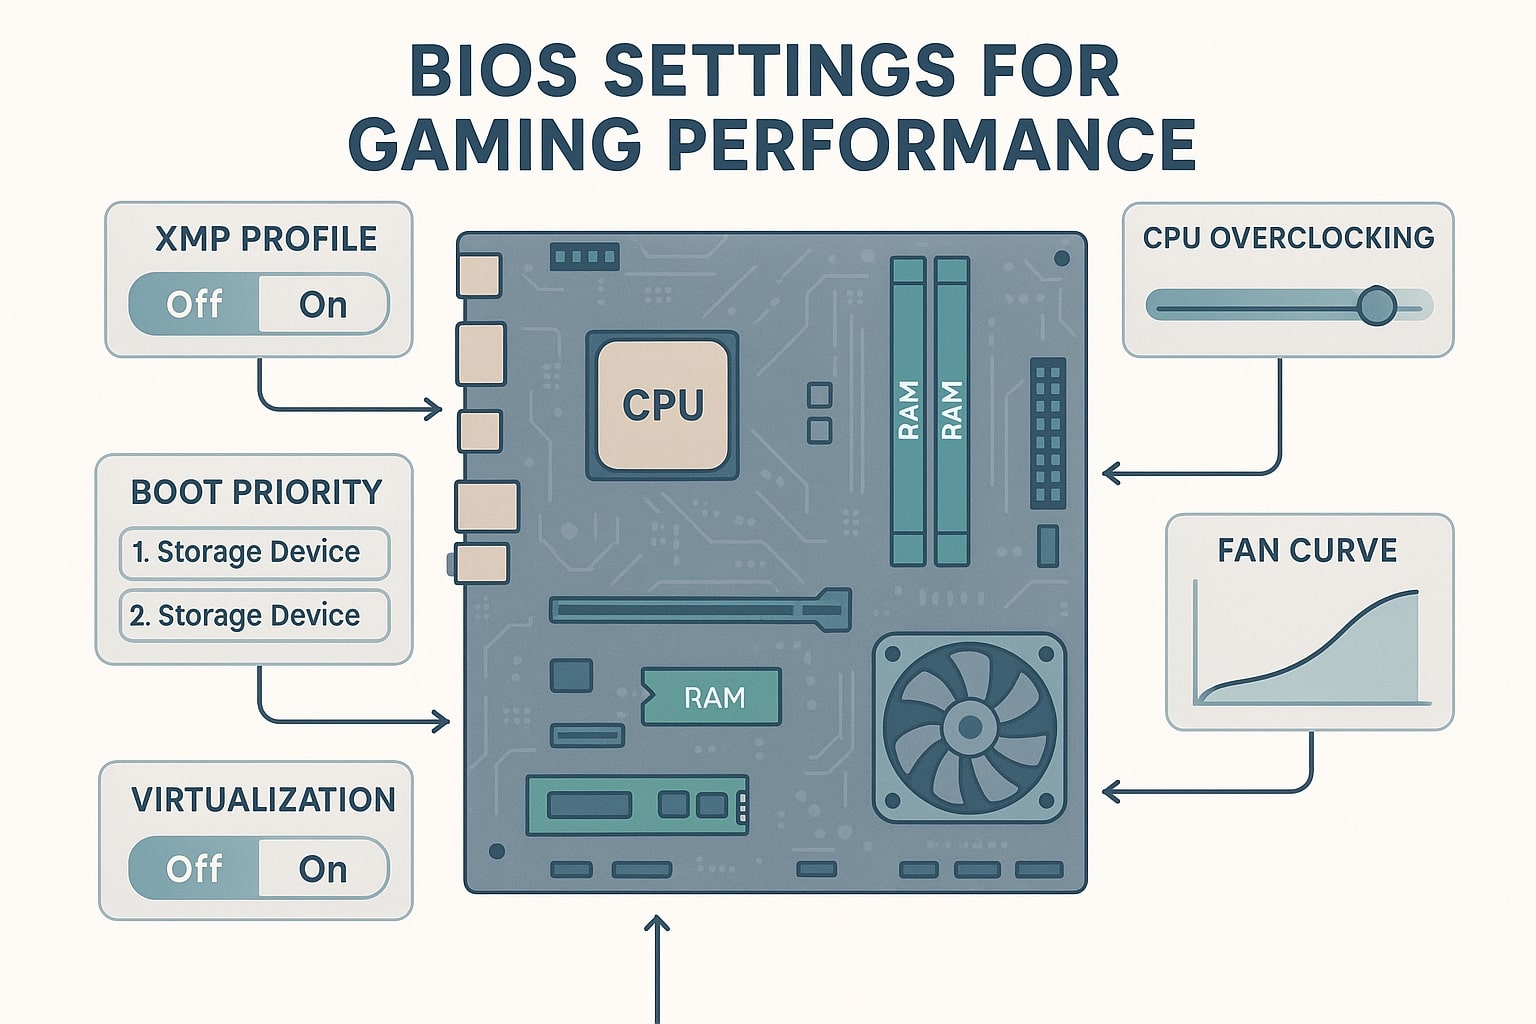
BIOS and Gaming Performance in Plain Language
BIOS (or UEFI on newer boards) is low-level software that starts your PC, checks that everything works, then hands over to your operating system. Although it usually hides in the background, it controls items that have a direct impact on gaming performance:
-
CPU speed behaviour
-
Memory frequency and timings
-
How your graphics card connects to the processor (PCIe)
-
Power limits and thermal safeguards
-
Smart performance features such as Resizable BAR and Game Boost
When you tune BIOS settings on a Ginger6 gaming PC, you are not replacing the careful work already done during the build. You are customising how aggressively the system uses the hardware that Ginger6 has already selected, assembled and stress tested for 24+ hours to make sure it runs reliably.
Here are a few setting families that matter most for gaming:
-
Memory options such as an XMP profile, memory voltage and timings. These influence how quickly game assets move between RAM, CPU and GPU.
-
CPU performance features including AMD PBO, curve optimizer and vendor-specific overclocking profiles. These can help multi-core processors maintain higher boost clocks during busy scenes.
-
Graphics and PCIe settings such as Resizable BAR (often written re-size bar) and PCIe link speed. These can lift frame rates in modern titles that are optimised for them.
-
Cooling and power controls including fan profiles and fan curves, which keep temperatures in check so performance stays consistent.
Handled sensibly, these options improve minimum frame rates, make gameplay smoother, and keep your system stable during long Ginger6 gaming sessions.
Safe Preparation before Changing BIOS Settings
A little preparation removes a lot of risk. Before touching a single menu, set yourself up so every change is easy to undo.
Back up Current BIOS Settings
Most modern BIOS interfaces let you save your current configuration to a profile. Look for options such as Save Profile, Save to USB or similar. If you cannot find one, take photos on your phone or write down the important values.
Having a snapshot means that if a new setting causes boot problems or odd behaviour, you can quickly return to a known-good state rather than guess where something went wrong.
Protect against Power Problems
Losing power halfway through a BIOS update or while saving settings can corrupt the firmware and, in the worst case, stop your motherboard from starting:
-
Plug your PC into a surge protector or UPS if you have one.
-
Avoid changing BIOS while storms are forecast or someone is likely to trip over power cables.
-
Disconnect non-essential USB devices so there is less chance of conflicts.
Ginger6 systems are built with quality power supplies and stable components, which already reduces the chance of issues, but a calm environment still helps.
Get Comfortable with the Interface
Different vendors label menus in their own way. Spend a few minutes just moving around:
-
Learn where the Advanced, Tweaker, or AI menus are.
-
Note where fan controls, memory settings and CPU options live.
-
Look for a help panel that explains each option in a sentence or two.
Once you start adjusting values, follow a simple rule: make one change at a time, then boot into Windows and test a game or benchmark. If something misbehaves, you know exactly which setting caused it.
Use Ginger6 Support if You Feel Unsure
If your system is a Ginger6 build, you are not on your own. Their UK-based team can talk you through safe settings for your exact motherboard, CPU and memory kit, and can advise when it is better to leave options alone.
Memory Tuning and Enabling XMP for Smoother Gaming
RAM speed and timings have a strong effect on gaming performance, especially in CPU-heavy titles or when chasing high refresh rates. Many systems ship with memory running at conservative default speeds. Enabling XMP is often the easiest win.
What XMP / DOCP / EXPO Actually Does
An XMP profile is a pre-tested set of memory timings, voltage and frequency stored on your RAM sticks. Motherboards from Intel platforms usually call it XMP. AMD boards may label similar options as DOCP or EXPO, but the idea is the same.
With XMP disabled, memory might run at something like 2133 or 2400 MHz, even if you bought a kit rated for 3200 MHz or higher. Turning the profile on tells the board to use the full rated speed and the correct timing values.
This can:
-
Improve loading times for games and levels
-
Raise average and minimum FPS in CPU-bound titles
-
Make general desktop usage feel snappier
On a Ginger6 system, each memory kit is chosen and stress tested with the board and CPU it ships with, so using XMP is usually a straightforward upgrade rather than an experiment.
How to Enable XMP Safely
The precise wording varies by manufacturer, but the process usually looks like this:
-
Restart your PC and press the appropriate key on your keyboard (often Delete, F2 or F10) to enter BIOS.
-
Go to the overclocking or advanced memory menu.
-
Look for a setting labelled XMP, DOCP, EXPO, A-XMP or similar.
-
Change it from Disabled / Auto to Profile 1 (or the main listed profile).
-
Save and exit BIOS.
After booting into Windows:
-
Run a memory stress test or play a demanding game for a while.
-
Watch for freezes, blue screens or odd graphical glitches.
-
If you see problems, return to BIOS and switch back to the default profile.
For those who want to push further, manual memory settings and subtimings can provide small extra gains, but the risk of instability rises quickly. If in doubt, stick with the automatic profile that matches your memory’s rating.
Combining XMP with CPU Performance Tools
Once XMP runs reliably:
-
AMD users can look at PBO and the curve optimizer to let the processor boost higher within safe temperature and power limits.
-
Intel users can review the CPU multipliers or vendor overclocking profiles, but should keep an eye on temperatures and power draw.
Again, adjust one value at a time and test thoroughly before moving on.
CPU, Graphics and Cooling Tweaks Worth Trying
With memory sorted, there are several other areas that can lift gaming performance when tuned carefully.
CPU Performance Modes
Modern CPUs are smart, adjusting speed and voltage on the fly. BIOS gives you some influence over how aggressive that behaviour is.
On many boards you will find:
-
Game Boost or similar one-click performance modes. These usually raise power limits and may apply a modest automatic overclock.
-
PBO (Precision Boost Overdrive) on AMD systems, which lets the CPU maintain higher boost clocks when cooling and power delivery allow.
-
Manual overclocking profiles that bump the CPU multiplier to a fixed higher speed.
These features can help remove short dips in frame rate during CPU-heavy scenes. However, they also raise temperatures and power usage. Ginger6 builds are stress tested for stability, but every chip is slightly different, so monitor temperatures with tools such as HWMonitor or MSI Afterburner and back off if you see uncomfortable numbers or fan noise rising too far.
Resizable BAR and PCIe Settings
Resizable BAR (often written resizable bar or re-size bar) allows the CPU to access the entire memory space of your graphics card instead of small chunks at a time. In games that support it, this can translate into a modest bump in gaming performance and smoother asset streaming.
To enable it you typically need:
-
A modern GPU from NVIDIA or AMD
-
A motherboard with Resizable BAR support
-
The setting switched on in BIOS
-
Sometimes, a compatible PCIe settings mode such as PCIe 4.0 with CSM disabled
Consult the manual for your specific Ginger6 board, or contact their support team, to confirm the exact requirements for your system.
While checking this menu, confirm that your primary graphics slot is running at the correct PCIe generation (often labelled Auto, Gen 4 or Gen 5). Forcing a lower generation can reduce performance, while forcing a higher one on older cards may cause unnecessary negotiation delays.
Fan Curves and Cooling Control
Keeping temperatures within a comfortable range is just as important as chasing clock speed:
-
Open the fan curves or hardware monitor section in BIOS.
-
Set fans to ramp up gradually as CPU or system temperature increases.
-
Aim for a balance where fans stay quiet during light work but respond quickly once temperatures pass a threshold during gaming.
A well-tuned cooling profile helps avoid thermal throttling, where the CPU or GPU slows down to protect itself. It also prolongs component lifespan, something that matters to Ginger6 just as much as raw performance.
Putting BIOS Tuning into Everyday Use
Once you understand the main settings, the real value comes from applying a light, sensible touch and knowing when to stop. For most Ginger6 gaming PCs, a small amount of tuning is all that is needed to keep games smooth and responsive.
It is also worth remembering that a Ginger6 PC is already built and tested to perform well out of the box. Every configuration is stress-tested for over 24 hours before it leaves the workshop, so you do not need to adjust BIOS just to enjoy smooth gameplay. Treat tuning as a way to personalise how your system behaves, not as a requirement for good performance.
If you ever feel unsure about which settings suit your particular build, or you run into problems after a change, the Ginger6 team is ready to help. They can advise on safe profiles for your exact hardware, talk you through resetting BIOS if needed, and suggest sensible tweaks when you upgrade components in the future. That way, you can push your system with confidence, knowing there is friendly, UK-based support behind you.